Last Updated – 12/26/20
This is a living document. I will put a “last updated” line at the top of this page to keep track. As I continue to learn how to refret guitars, I thought it’d be good to keep a list of the steps I take. It’ll help me remember everything I need to do, and will act as my own “notes.” For anyone interested in fretting, it might be interesting. For those who are already experts, it’ll be a clumsy set of badly-written directions that contains numerous errors. No, I hope not – I do hope if anyone sees something that is a factual error (not opinion-based) they’ll email me and let me know! Onward.
IMPORTANT – A level/crown job is waaay easier than a refret. Before doing a refret, I will find the fret with the biggest dent and file it down until the dent is gone. Then I’ll see that the height of the fret is. If it’s still high enough, I’ll do a level/crown. Eventually I’ll probably be able to tell from experience just by looking at the dent.
NUTS – If you are doing a refret, it is possible you might need to replace the nut. If you are doing a level/crown, you can usually get away with not touching it.
Budget Guitarist Top Fretting Tips:
- Your tools = your fret job. Dan Erlewine could refret a guitar in the back yard with a pocketknife and a nail file. You can’t. You suck at it… or at least you will at first. Having the appropriate tool is a short cut to getting better quality work. When you can, buy generic alternatives to the stewmac stuff. When you can’t, buy the expensive good stuff from stewmac. Which tools do you really need to do a great job? All of them. But some tools you can make on your own.
- Here’s a BIG switch for me. I used StewMac fret erasers for a long time, but now I’ve gone back to sandpaper, and I’m getting much better results. I use 320, 600, 1200, and 2000 grit, and I soak them in water overnight before using them. This has really improved my work.
- Don’t do this to “save money.” You’ll blow more money on tools than to pay for a refret. This is only for people who want to learn how to do this and will enjoy the process and look forward to the next refret. If you have a guitar collection, that’s different – you’ll save much money in the long run.
- Homemade fret rockers SUCK. There’s a reason every video you see has a luthier using a stewmac fret rocker – it’s because they’re super, super, super flat. I used many different things before breaking down and spending almost $30 on the stewmac fret rocker. But you’d be surprised at what a huge difference it can make in your fretwork. I’m budget-minded, but this tool is worth it.
- Here’s a tip that Jon Sullivan of Sully Guitars gave me. Hobby Lobby sells water thin superglue. You don’t have to order it from StewMac if there’s a Hobby Lobby near you. I got the thin, medium, and thick glues from Hobby Lobby and they’re great. ALSO, they sell extension tips, which are well worth buying.
- In addition to Hobby Lobby, see if there’s a Harbor Freight near you. It’s like Lowes or Home Depot, except everything costs way, way less.
Refretting A Guitar
Section 1 – Getting Ready
- Gather Tools. You don’t want to be hunting for something when you have 5 seconds before the superglue dries. Here’s a list of the tools I currently use for a refret. Each tool is an Amazon-affiliated link – if you use one of these links to buy a tool, Amazon sends me a small amount of money, which helps pay for this website and also my YouTube channel.
- Hand Tools
- Allen wrench for the guitar’s truss rod
- Screwdriver set
- String cutters
- String winder
- Optivisor (or strong reading glasses) – HINT – they sell optivisors cheap at Harbor Freight
- C Clamp (or almost any kind of clamp)
- Dremel (with attachment for buffing)
- Soldering Iron (in stand with sponge)
- Small fret pullers
- Large fret cutters
- Scissors
- Linoleum Knife
- Linoleum Knife with hook-shaped blade
- X-Acto Knife
- Sanding-Related
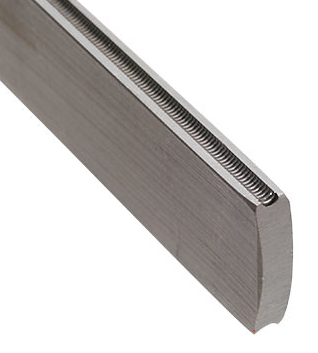
- Fret Leveler with 320 grit sandpaper
- Sanding block with 120 and 220 grit sandpaper
- Wet/Dry Sandpaper – 320, 600, 1200, and 2,000.
- Radius Block. Buy one that is the radius you want.
- Filing-Related
- Three corner medium fret file
- Fret crowning file
- Fret end dressing file
- Small triangle file
- Fret Beveling file
- Measuring Tools
- Miscellaneous
- 1 package of Fender Standard (Medium-Jumbo) Frets (or cut your own and bend your own)
- Homemade fret holder with holes for up to 24 frets
- Painter’s tape
- Green marker
- Thick and thin superglue. Hint – get thin superglue from Hobby Lobby.
- Titebond wood glue
- Regular white glue
- Double-sided duct tape
- Lots of dry, lint-free cloths/rags
- Lighter Fluid
- Fretboard Oil
- Hand Tools
- Examine neck. Adjust the truss rod to get .010 relief at the 8th fret. Why? So I can look the neck over and make sure it isn’t a lost cause. If the fretboard is maple, swear creatively because you know it’s going to be 5 times more difficult. Use at least three really bad words in a new and unique order.
- Remove Strings. Detune the strings, then clip them all off except the high E string. Take that off and save it, if possible. If I’m going to break a string, ever, it’s going to be the high E.
- Remove the neck. Take neck from the body, if neck is a bolt-on, and put the body elsewhere. You know how to hide bodies.
- Straighten the neck. Use the allen wrench to adjust the truss rod under the notched straight edge shows the neck is as straight as you can get it.
Section 2 – Replacing the Frets
- Remove frets.
- Preheat soldering iron and dampen sponge in stand.
- Using the small fret pullers as a guide, heat and pull each fret. Do this on plain table, and gather up any wood dust from the neck and save.
- Do not touch the soldering iron to the fretboard, dummy.
- Fix holes. If there are any holes, fill them with fret dust and hit with small amount of thin superglue. Dan uses a teflon dam in the slot, and I need to start doing that too. I’m going to try some thick paper covered with wax, like Dan uses in his first fretting video. That way I won’t feel bad when I fuck it up, because Dan did too. I did see one video where the guy just used superglue and no fret dust to fill holes – I’m going to try that.
- Level the fretboard. I use 16 inch leveling beam that I bought from StewMac. It was way too expensive, but it sure is nice and flat and heavy. At this point, I barely touch the fretboard – I just want to flatten out anything sticking up, especially around the fret slots, including any lumps from filling holes. (NOTE – On a maple neck, this is awful. You can’t really sand the fretboard much or you’ll remove the finish. Just get the area around each slot.) You want to check the radius with your radius gauge and then use the radius sanding block if needed.
- Clean fret slots. I like using the linoleum knife with the hook. You can buy the fancy StewMac thing, but you can buy hook-shaped blades for your cutter from Lowes. That’s way cheaper. NEW – I found a super thin saw at Hobby Lobby – thin enough for fret slots – for about $6. Also another tip – regardless of what metal you’re using, heat it up with a lighter. But don’t breathe in any melted superglue fumes.
- Chamfer the slots. I use a small file shaped like a triangle and widen the tops of the slots a little bit. This makes it way easier to get the frets seated correctly. Don’t overdo it or you’ll end up with a fret that’s seated too deep into the wood.
- Check the neck again. I use the notched straight edge and adjust the truss rod if necessary. The neck has to be flat or you’re going to fuck, err, mess this whole thing up.
- Precut the frets. I like to cut the length for each fret and save them in a block of styrofoam with numbers for each fret. I also like to nip off the barbs a little bit on each end of each fret. That helps because you can then fill the gap with superglue later.
- Put in the frets.
- Optional: Apply thin superglue to top of fret slot. NOTE – If the fret slot is too wide due to the number of refrets, use wood glue? The jury is still out on this for me.
- Gently seat the fret manually, then tap it in. Tap each side, then tap from one end of fret to another.
- Make sure fret is fully seated all the way across.
- Repeat until all frets are in.
- Go do something else for at least an hour or two.
- Clip all of the fret ends off with fret cutter.
- Fill fret slot ends.
- Put a strip of painter’s tape down the side of the neck that will be facing down.
- Clamp neck with one side facing up.
- Put a dot of thin superglue into the small gap where the fret tang would be. And if there is a fret tang there, do it anyway. It’ll go under the fret.
- Once glue is dry, flip over and do other side.
Section 3 – Finishing the Frets
- Sand fret edges.
- Using sanding block with 220 grit paper, sand the edges of the frets on one side flat. Then go back and sand the ends at a 30 degree angle.
- Repeat for both sides. If possible, move up in sanding grit to 320 then 600.
- Remove all dust.
- Tape the board.
- Level the frets.
- Use green marker and mark the tops of all of the frets.
- Put 320 grit sandpaper on fret level and level the frets until the green is gone.
- Use the fret rocker and locate high spots. Mark with green marker and bring them down with 320 sandpaper.
- Crown the frets.
- Mark all fret tops with green marker.
- Use fret crowning file and go from fret 1 to the last fret. Shoot for a consistent thin green line on each fret in the center.
- Use the fret rocker and locate high spots. Mark with green marker and bring them down with 220 grit fret eraser (if possible) or the medium three corner file.
- File out scratches and polish frets.
- For each fret, sand/polish using wet/dry sandpaper – 320, then 600. Then 1200 and 2000. ONLY sand from one end of the fret to the other and back.
- Get out the Dremel with small buffing wheel. Buff each fret top, then wipe clean. Ooh, shiny!
- Remove the tape and clean board and neck with lighter fluid.
- Oil the board.
- Finish the fret ends. Using fret end file, get rid of the hard edges on each fret end. Then, using sanding sock, flap-sand down the fret edges using 1200 or higher grit sandpaper.
Section 4 – Reassemble the Guitar
- Finish up.
- Put the neck back on the guitar.
- Restring.
- Adjust truss rod as needed.
- Play every fret. If anything buzzes:
- Mark spot with green marker.
- Detune strings and put velcro on them (to keep them from tangling.)
- Remove neck with strings still attached.
- File down (or recrown) green spots.
- Put neck back on, tune up, play every fret.
- Done!
Section 5 – Where I Need(ed) Improvement
- Uneven fret and fretboard edges. On refrets I’m still having issues with the edges of the frets on a refret. I’ve been using sandpaper on a sanding block and trying to hold it at the perfect angle, and sanding the fret edges down to the fretboard so that it’s one clean level surface. But I think I’m not holding the angle well enough – I think it’s changing. And I’m having issues where some frets sticking out take forever to sand down. Fix – I bought a fret beveling file, which pretty much took care of this issue.
- After level/crown/polish, some frets seem to end up uneven. This could be the neck adjusting to having no strings on it. Fix – Use truss rod adjustments to make sure that thing is straight. Don’t over-crown. Check with homemade fret rocker while crowning and then while polishing, and keep checking neck straightness.
- Frets not as smooth as I’d like after polishing. This is likely because there are still scratches that haven’t been sanded out. Fix – It starts with being deliberate with my files and not over-crowning or over-filing. Then after crowning, use wet coarse sandpaper to remove scratches before moving up through the sandpapers to polish.
I would strongly encourage anyone learning fretwork to make your own list. It makes it easier to see where you might not be doing things in the correct order, and as you create the list you’ll likely come across where you still need to learn techniques or buy tools. If you haven’t done so already, you need to buy Dan Erlewine’s book “Fretwork Step By Step.” It is very good. You might also get every video Dan has ever made, because they are all very, very good, and watch every video on StewMac’s YouTube channel. I also think Dan’s book “How to Make Your Electric Guitar Play Great” is an extremely good purchase. I bought it and I’ve learned a lot from it. Affiliated Amazon link below. For the other stuff, go to stewmac.com.
Affiliated Amazon Links
- How to Make Your Electric Guitar Play Great – Book by Dan Erlewine. Good overview for those kind of interested in this stuff.
- Guitar Player Repair Guide – THE book you HAVE to own if you’re serious about working on guitars. Also by Dan Erlewine. This is the most popular guitar repair book in history for a reason – it’s great.